

9787
.pdf30
The teacher can divide assignments and tests by topic, or add them to the very beginning of the course.
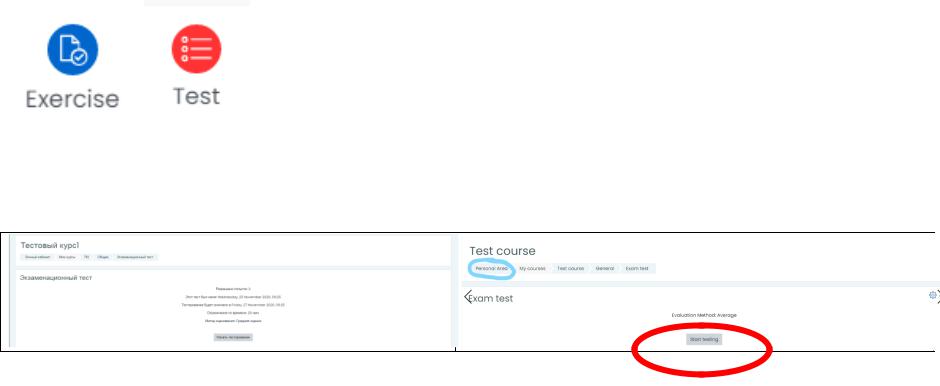
Each element on the course page has its own meaning. The teacher can give a task, a test, surveys, hyperlinks or files that have different icons. Explanation of icons (Picture1.6):
Picture1.6 - Icons of course elements
31
As a rule, the main elements of the course for the student are the exercise and the test
2. Passing the test
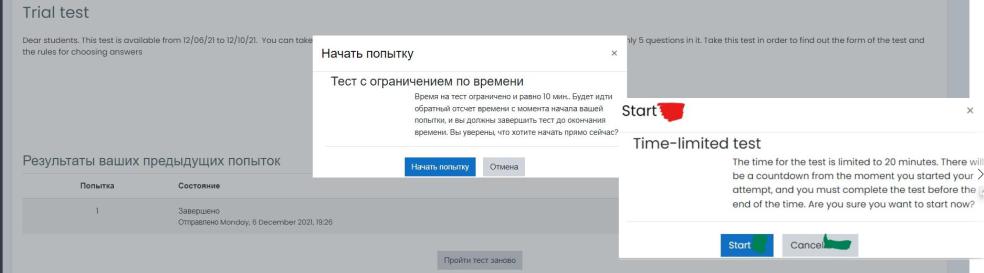
To pass exams, and other tests, you need to open it by clicking the mouse button. A window will open to start testing with
its description (Picture2.1):
Picture2.1 - Start testing
To start testing, you need to click the "Start testing" button. If the test is with a time limit, then a warning about it will
appear on the screen (Picture2.2):
32
Picture2.2- The beginning of testing
To continue, you need to click the "Start trying" («Начать попытку») button.
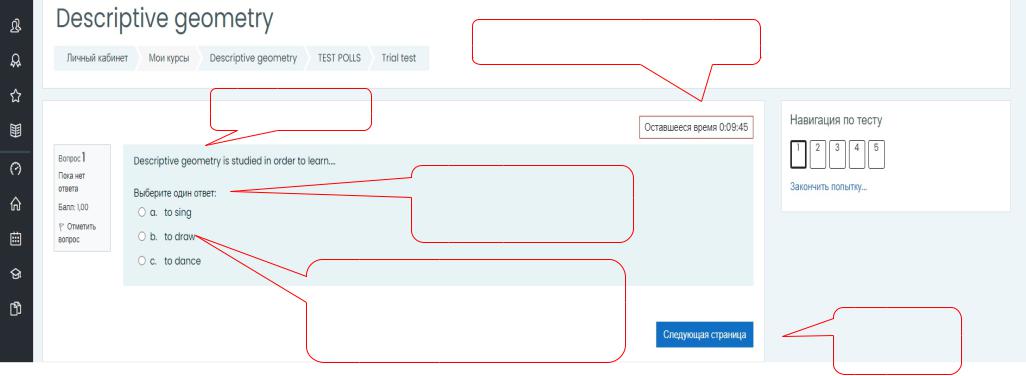
The test may have different types of questions with one or more answer options. This will be indicated in the description of the question (below its title) (Picture2.3).
It is advisable to give answers to all questions. This will be reflected in the menu on the right in the Test Navigation, as well as the remaining time for testing.:
33
Countdown to the end of the test
The question
Instruction: indicate one answer
Answers. |
|
|
You must place the cursor in front |
|
|
of the correct answer you have |
Go to Next |
|
chosen |
||
page |
||
|
||
Picture 2.3 - Passing the test |
|
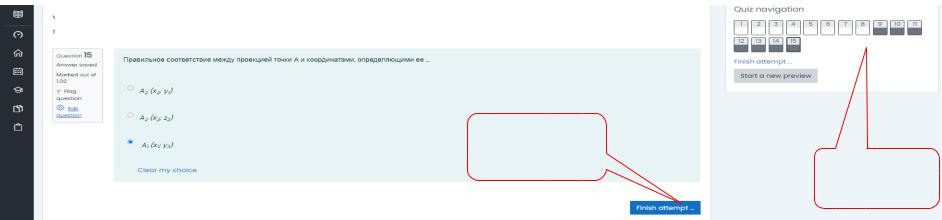
To go to the next question, you need to click the blue "Next page" button. After answering the last question, you need to click the "Finish trying" button (Picture 2.4):
34
Finish trying
the Test
Navigation
Picture2.4 - End of testing
After clicking this button, the test system will ask you for confirmation, since after submitting you will not be able to change your answers. You must confirm your consent or cancel and return to questions (Picture 2.5):
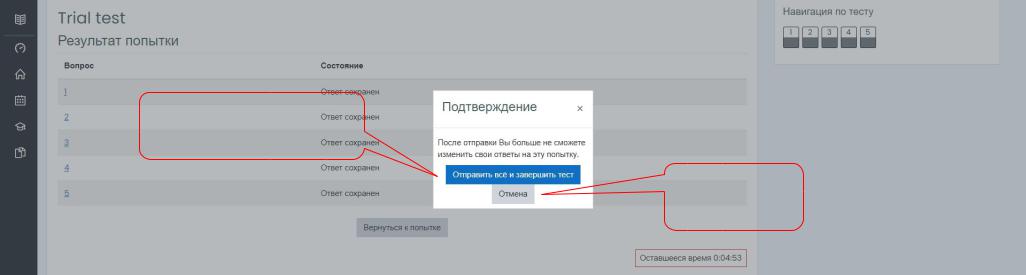
35
Submit everything and complete the test
Cancellation
Picture 2.5 - Confirmation of consent to end the test
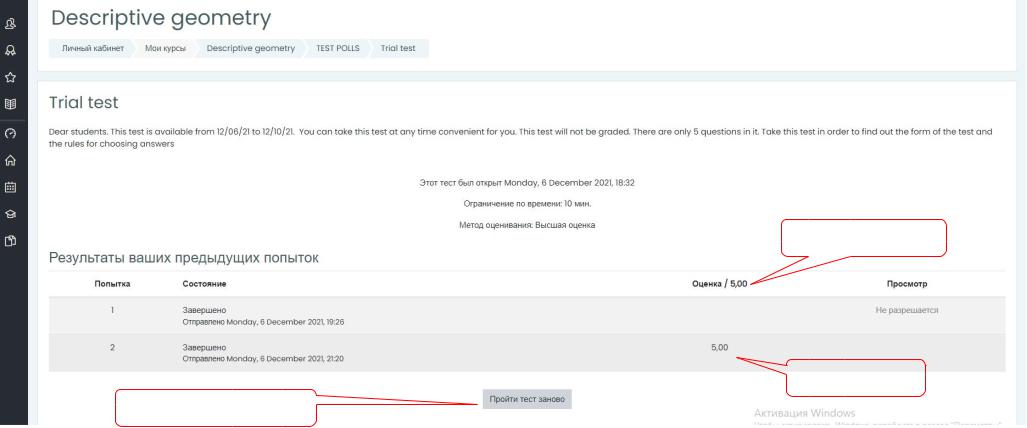
The opened window will show the status of the answers to the question. Each question should have "The answer is saved". To finish testing, you need to click the "Submit all and complete the test" button. After the review is completed, the scores and grades received for each attempt to pass will be shown, as well as the total final score for the test (Picture 2.6).
If your score is less than 2.5, you can take the test a second time, you need to click the button «Take the test again». To return to the course, you need to click the button "Return to the course".
36
Maximum score
Your score
Take the test again
Picture 2.6 - Viewing the results
37
3. Completing the assignment, passing the calculation and graphic work, term papers and other works
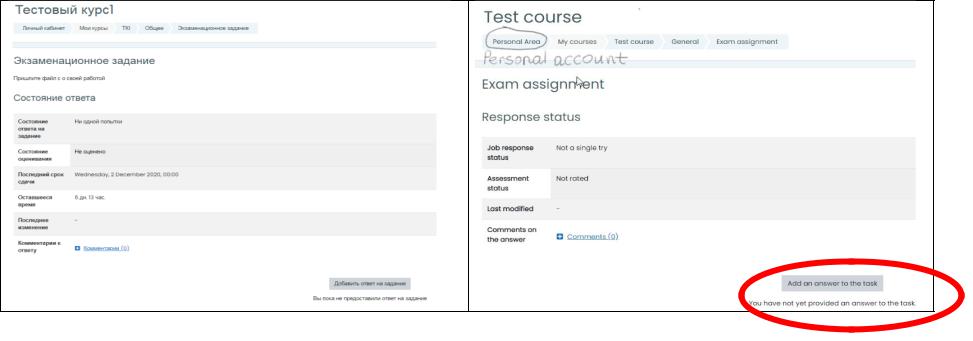
The "exercise" element allows the teacher to set tasks that require students to prepare an answer in electronic form (in any format), for example, a photo of the work or a text file, and upload it to Moodle. After checking the teacher can set tasks assessment and write a review of the work. The student can see the teacher's assessment and comment.
If you have already completed a task or test, then there will be a check mark in the box opposite it on the right.
To complete the task, you need to click on it, and a window will open with an explanation of the evaluation states, response, deadline, time and comment (Picture 3.1):
Picture 3.1 - The status of the response to the task

38
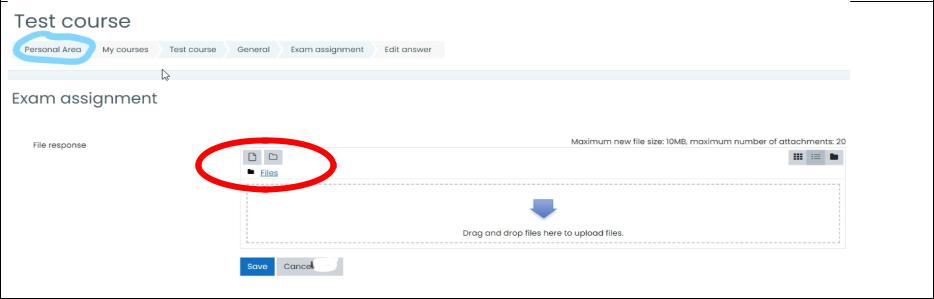
To give an answer to the task, you need to click the button "Add an answer to the task". A window opens for uploading a file
and/or writing a written answer to the task (Picture 3.2)
39
Picture 3.2 - Adding a response to a task
The name of the assignment is indicated in the upper right corner, and the teacher's explanation is below it. The "Text Response" window can be left empty if the teacher does not require a written response.
ATTENTION!!! If the response is in the form of a file with a size of more than 20 MB, then you need to upload it to the cloud storage, create a public link and add it to the "Text Response" window. You can use cloud storage Yandex, Google, Mail, etc.
If the file size is less, then you need to attach it to the "Response as a file" window. You need to click on the button in the form of a file. A window opens to select a file (Picture 3.3):