

56 |
POWER EXCEL WITH MR EXCEL |
|
|
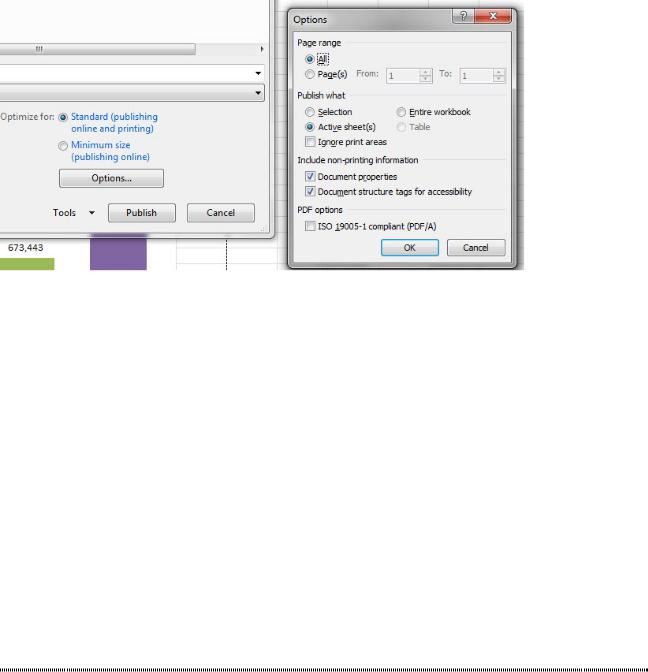
Figure 122 Print your workbooks to PDF.
Let’s face it. People send you PDF files when they don’t want you screwing around with their data. But, let’s be truthful here: You need to screw around with that data.
If you have ever tried to select data from a PDF file, copy it, and paste it to Excel, you know that there are three basic kinds of PDF files:
●● Files that paste amazingly well to Excel
●● Files that paste a table into a single column
●● Files where the text and numbers have been converted to an image so that you can’t copy and paste to Excel
You would think that a PDF file created by Microsoft Excel would automatically create a file that would round-trip beautifully to Excel. Unfortunately, they use the second type of file that will not paste nicely back into Excel. This isn’t as evil as converting everything to images, but it is almost as bad.
Ironically, if you copy the PDF file, paste to Word, then copy from Word and paste to Excel, the results are better. (How many times have you ever heard me suggest that you open Word?) If you have Word 2013, you can natively open the PDF in Word, then copy to Excel.
If you have to regularly take data from PDF files to Excel or Word, I highly recommend a product called Able2Extract from InvestInTech. You can get a free 30-day trial to try it out. The standard version handles either of the first two types of PDF files. The deluxe version can also handle PDF files where everything has been converted to an image. For more details, see www.mrexcel.com/tip107.shtml.
SEND AN EXCEL FILE AS AN ATTACHMENT
Problem: I need to send my currently open Excel workbook as an attachment to an Outlook e-mail message.
Strategy: You can select File, Save and Send, Send Using E-Mail, Send As Attachment.
Excel will open something that looks a lot like the Outlook Send Mail dialog. Fill out the addressee list and the subject line and click Send.
Gotcha: Although this looks like Outlook, it is actually an Excel version of the dialog. While this dialog is displayed, you cannot access other Outlook e-mails. This can be a problem. What if you receive a file from someone not in your address book, edit the file, and then need to send it back? You will find that you need to access the original e-mail to get the sender’s e-mail address, but you cannot switch to another e-mail message until you’ve sent this one.
The solution is to click the Save icon in the Outlook Quick Access Toolbar. Then click the Close Window
(X) icon in the upper-right corner of the window. The unfinished e-mail will be saved from Excel to the Outlook inbox, and you will be returned to Excel. You can now safely switch back to the original Outlook e-mail to get the address.
PART 1: THE EXCEL ENVIRONMENT |
57 |
|
|
|
|
|
SAVE EXCEL DATA AS A TEXT FILE |
|
|
|
Problem: I am working with an Excel file. I need to produce a file for another application to read, but that |
|
|||||
application can read only .txt files. |
|
|||||
Strategy: You have a couple options. Typically, the other application will either want the columns to be |
|
|||||
separated by a fixed number of spaces or separated by commas. Files with columns separated by commas |
|
|||||
are called comma-separated values, or CSV, files. CSV files are easier to create than space-separated files. |
|
|||||
Here’s how you create a CSV file: |
|
|||||
|
1. Select File, Save As. In the Save as Type dropdown, choose CSV (Comma delimited) (*.csv). |
|
||||
|
2. Click the Save button. Excel will generally warn you that you are saving the file in a format that will |
|
||||
|
|
leave out incompatible features. This means that you should re-save the file as an Excel file later in |
|
|||
|
|
order to keep the compatible features. Important: Only the current worksheet is saved in the CSV |
|
|||
|
|
file. If you have multiple worksheets in the workbook, save each worksheet separately. |
|
|||
|
3. After saving the file as CSV, use Save As to save the file as an Excel file. |
|
||||
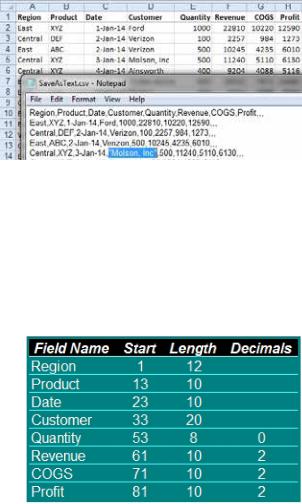
Results: The figure below shows the created file as it appears when edited with Notepad. Pay particular |
|
|||||
1 |
||||||
attention to the “Molson, Inc” entry. Because cell D5 already contained a comma, Excel was smart enough |
||||||
|
||||||
to surround Molson, Inc with quotation marks. |
|
|||||
|
||||||
Figure 123 Excel adds quotes around a cell that contains a comma.
Gotcha: The dates in column C are written to the file in the same format as they were shown on the worksheet. Most programs will not understand a date such as 1-Jan-04. Check the documentation of the program that will import the information, and if you need to, format column C to appear as mm/dd/yyyy before exporting to CSV.
Alternate Strategy: Another option is to create a file in which each field is supposed to take a fixed num- ber of characters. You might need to use this method to produce a file which is to be imported by another application. In this case, the other application will usually give you a file specification for you to follow. It might indicate the following:
In this case, you follow these steps:
1. Go through the columns in the worksheet, resetting the column widths. If the other program expects the Region field to be 12 characters wide, for example, select column A and then choose Home, For- mat, Column Width and set the Column Width text box to 12.
2. Format the dates as specified by the other system. Make sure the Revenue, Cost, and Profit columns show two decimal places. The other system probably will not want field headings, so delete row 1.
3. Select File, Save As. In the Save as Type dropdown, select Formatted Text (Space Delimited).
58 |
POWER EXCEL WITH MR EXCEL |
|
|
Gotcha: Excel changes the file name so that it has a .prn extension. Even if you try to change the exten- sion to .txt here, Excel will still save the file with the extension .prn. It is best to leave it as .prn and then rename it in Windows Explorer.
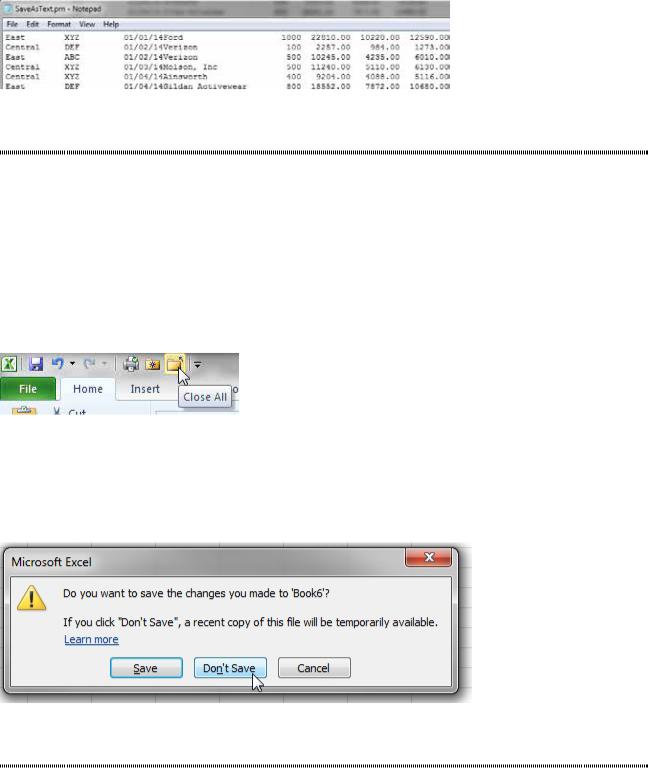
4. When Excel warns you that you will lose features if you have multiple sheets, click Yes. The figure below shows the resulting file, viewed in Notepad.
Figure 124 Data is neatly aligned in columns..
CLOSE ALL OPEN WORKBOOKS
Problem: I have 22 Excel Workbooks open. I want to keep Excel open but close all the workbooks. Excel no longer has a Close All icon on the ribbon, and selecting File, Close 22 times can get monotonous.
Strategy: You can add a Close All button to your Quick Access toolbar. Follow these steps: 1. Right-click the Quick Access toolbar and choose Customize Quick Access Toolbar.
2. In the left dropdown, choose Commands Not in the Ribbon.
3. Find the Close All item in the left list. Select Close All. Click the Add button to add the icon to the Quick Access toolbar. Click OK to close the Excel Options dialog.
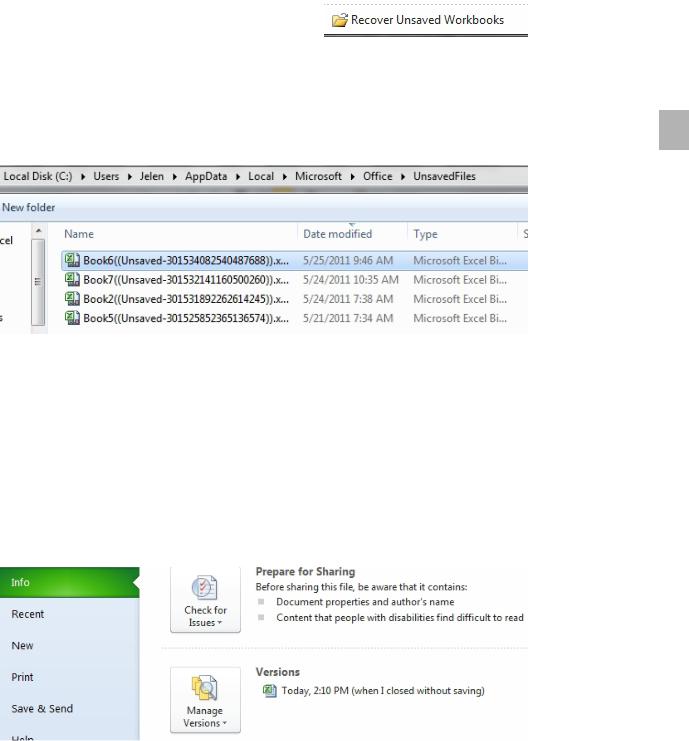
Results: The Close All icon will be available on the Quick Access toolbar. When you click this icon, Excel will still individually ask you about any unsaved documents. However, it is a faster way of closing all open workbooks than manually closing each one.
Figure 125 Close All, but keep Excel open.
Gotcha: The Close and Close All icons look the same in the Quick Access toolbar. If you want to have both
Close and Close All, add them to the Excel ribbon so that the label will appear for each icon.
Additional Details: If your workbooks are unsaved, Excel will ask you if you want to save each one. Here is a cool trick: hold down the shift key while clicking Don’t Save. Excel will repeat that answer for all of the remaining workbooks.
Figure 126 Shift while clicking to apply the answer to all workbooks.
I JUST CLOSED AN UNSAVED WORKBOOK
Problem: I had 20 budget files open and I used the previous trick to close all workbooks. I used shift-click on Don’t Save to close all without saving. But then I realized that I also had another file opened that I needed to save.
Strategy: You might be able to recover that file. You have to meet all of these criteria: ●● You have to be using Excel 2010 or newer
PART 1: THE EXCEL ENVIRONMENT |
59 |
|
|
|
|
●● |
The file has to be old enough to have been AutoSaved |
|
●● |
The file must never have been saved (i.e. it is still called Book7 or something like |
|
|
that. |
|
When you realize that you closed Excel and did not save the workbook, follow these steps: |
|
|
1. |
Open Excel. |
|
2. |
Open the File menu and go to the Recent Documents. |
|
3. |
At the bottom of the right panel, use the Open Recent Documents icon. |
|
Figure 127 Find this at the bottom of Recent Places.
Gotcha: The Recover Unsaved Workbooks feature only handles the workbooks that had never been saved.
As a test, I just closed the workbook from the next topic without saving. When I look at the
unsaved documents, I have four books from the last week. None of them are the workbook 1 from 2:10 PM on May 25.
Figure 128 Microsoft saved four workbooks that I didn’t think were important.
Here’s why: the workbook had been saved previously with a real file name. It will not ap- pear in this list. But, you still have hope!
When you are editing a workbook that has previously been saved, Excel will perform an
AutoSave every ten minutes. (Note: the AutoSave only happens if you’ve been making changes. If you leave a workbook open while you go to lunch for an hour, Excel will not waste five AutoSaves when there has been no activity.) Excel normally keeps the last five AutoSaved versions. When you close a workbook and decline to save the file, Excel will keep the most recent AutoSave file.
Open the workbook. You will see your changes are gone. Before you start making changes to the file, go to File, Info, Manage Versions. The unsaved version of that file could be available there.
Figure 129 This is good…the unsaved version is still available.
You should click on the unsaved version to open it in read-only mode. The message bar will tell you that it is a temporary version.